
Clean the area selected to hang the ceiling fan. Prepare tools and consumables, remove the existing electrical box, and repair the UL-listed outlet box labelled “Available for fan support.” Make sure the fan weighs no more than 50 pounds when in motion.
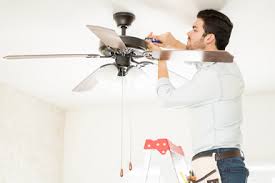
Installation of fan is not easy task and if you can think that you can do it by yourself by using ladder, you are wrong. An electrician can install a ceiling fan much more safely. Below are process used by the electrician for Ceiling Fan Installation
1) Elimination of existing boxes
When removing the existing electrical box, be careful not to damage or crack the ceiling. Use a screwdriver to remove the extra screws and washers and pull the electrical box out of the ceiling opening. If you suffer from sensory processing disorder, get in touch with electrician
2) Fixing U bolt and support brace
Once this is done, the next step is to install the U-bolt support bracket. To do this, the support brace must be inserted into the ceiling opening and placed between the two closed joints.
The support braces need to be locked and must be rotated until it locks.
You can now easily screw the U-bolt onto the safety clamp.
3) Modify the new distribution box
To install a new outlet box, you need to remove the knockout hole in the outlet box and install the cable clamp.
It is important to supply the supply line through the clamp to extend the 6-inch long line from the box.
Align the outlet box with the U-bolt bracket through the ceiling opening.
Connect the outlet box directly and secure it with nuts and washers.
How to install the ceiling fan?
Steps to follow:
Installing a ceiling fan is not too difficult, but it can take several hours depending on the type of fan.
Required tools: ladders, pliers. Wire strippers, screwdrivers, power tools
1) Mounting the mounting bracket
The outlet box is ready to attach the bracket with washers and nuts.
You will also need to lay the wires through the openings in the brackets and remove the motor shipping block but set aside the screws for attaching the blade plate.
2) Installation of the motor housing
- The fan wire should be trimmed to a length of 6 inches, and the 1/2 inch insulation stripped off at the end of the wire.
- Motor coupling fixing screws must be carefully removed
- The rod should be tightened with threaded wire for 4-5 turns through the previously assembled rod.
- Tighten the screws with pliers.
- Take the canopy and pull the wire to lower the rod.
- If done correctly, a loose canopy will be attached to the top of the motor housing.
How to connect the ceiling fan?
- Insert the assembled motor rod ball into the slot of the sealing bracket.
- You need to make sure the fan is locked, so make sure it’s locked and rotate it.
- The mounting bracket must be placed with the control receiver
- Take the bare metal wire, pass it through the plastic wire connector to connect the wire, and twist it clockwise to make a secure connection.
- Push the entire connection into the outlet box.
- Grounded and ungrounded cables must be separated on both sides.


